Important:
If you insert or move pages in your original document (for example, in InDesign) AFTER a version has been uploaded to WebProof, it is important that you reorder the pages the same way INSIDE WebProof before you upload the next version to make sure that all previous page history and summary information matches correctly.
- Right-click under "Projects" and select "Edit Project". Ad more pages to the project.
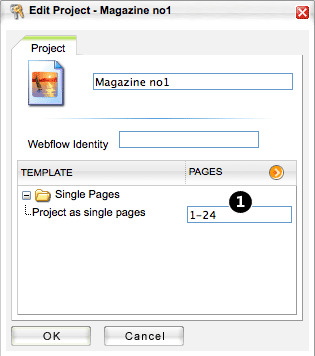
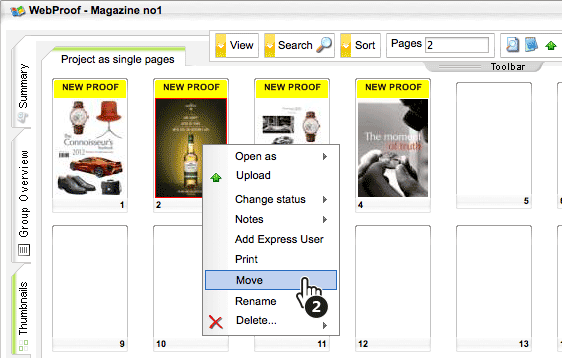
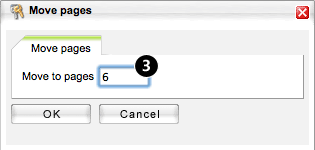
- Highlight the page or pages (hold ctrl (cmd on Mac) or shift (single/multipages), e.g. 1,3-4), right-click page, select "Move" and enter the page number in the field to where the page(s) will be moved. Remember, it is only possible to move to empty pages.
- If subsequent pages are also to be moved, they must first be highlighted. Then, in the "Move pages" dialog, enter the page number(s) where the first page will be moved to. The last field is then automatically populated.
Example 1: If pages 2-3 switch places with pages 6-7 in InDesign, you have to make the same changes in WebProof before you upload the document to WebProof again. Do it like this:
- Add two new empty pages to the WebProof project.
- Move pages 2-3 to the empty pages.
- Move pages 6-7 to pages 2-3.
- Move the old pages 2-3 to pages 6-7.
- Delete the empty pages.
Example 2: If you insert two new pages between pages 3 and 4 in InDesign, then remember to add two extra pages in the WebProof project, and move the pages from 4 to the end of the document two places up.
Comments