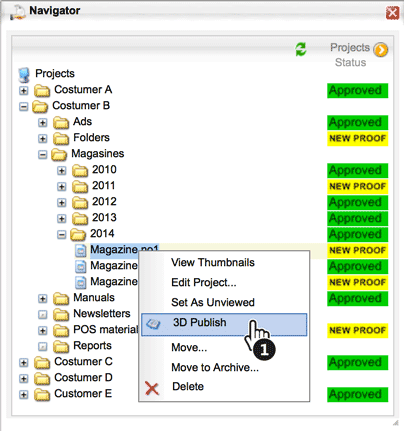
- Select the job/project in the WebProof Navigator window and choose 3D Publish from the right-click menu .
- Just choose "Publish" and the whole project will be published with the shown default setting.
A. Change the publication title.
B. Change the mouse-over guides in the publication preview.
C. We strongly recommend recommend keeping the Vector setting that keeps all text vectorized and sharp. If "Image" is selected both graphics and text are rasterized. Filesize can then drop a bit and the text is no longer selectable and sharp.
D. Choose a selected page range from the project.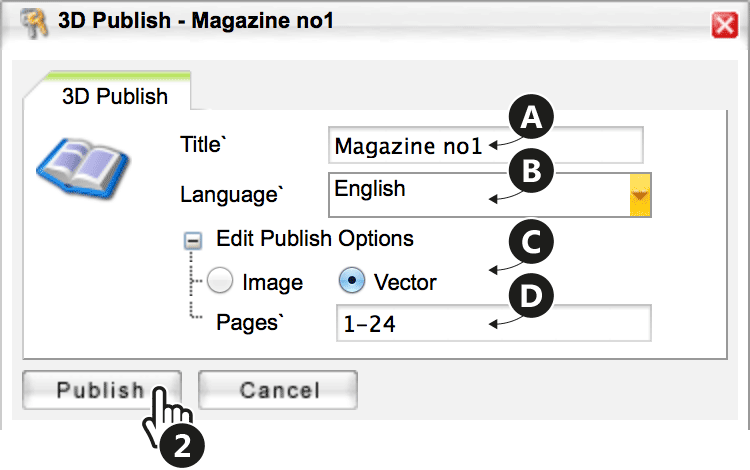
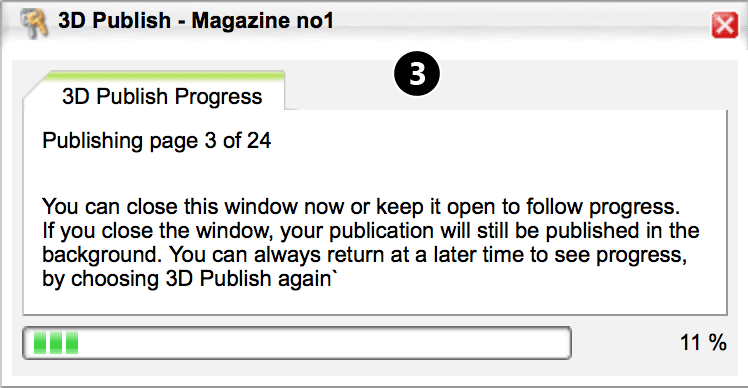
- The progress bar can be closed during publishing. Just return later by using the right-click menu in Naviagtor or from the 3D-admin module.
- The project is published.
- Click and use url for access to the Publication Preview.
- Login to 3D Publish Admin.
- If there have been changes made to the WebProof Project and it needs to be updated choose "Republish".
NOTE: If you have changed the number of pages in the WebProof Project, you will have to delete the page-flip in 3D Admin and Publish a new page-flip. Be aware that the you will also get a new url.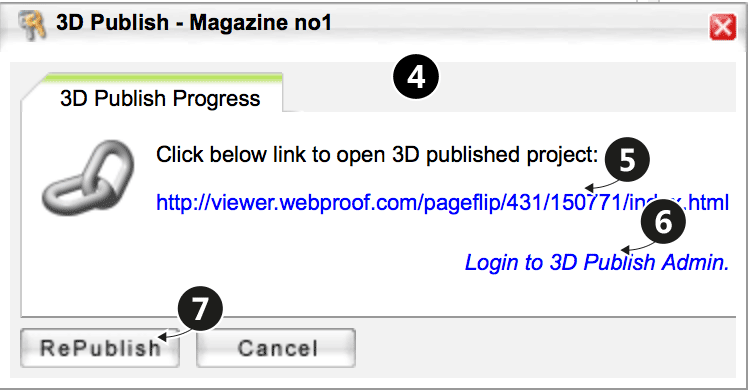
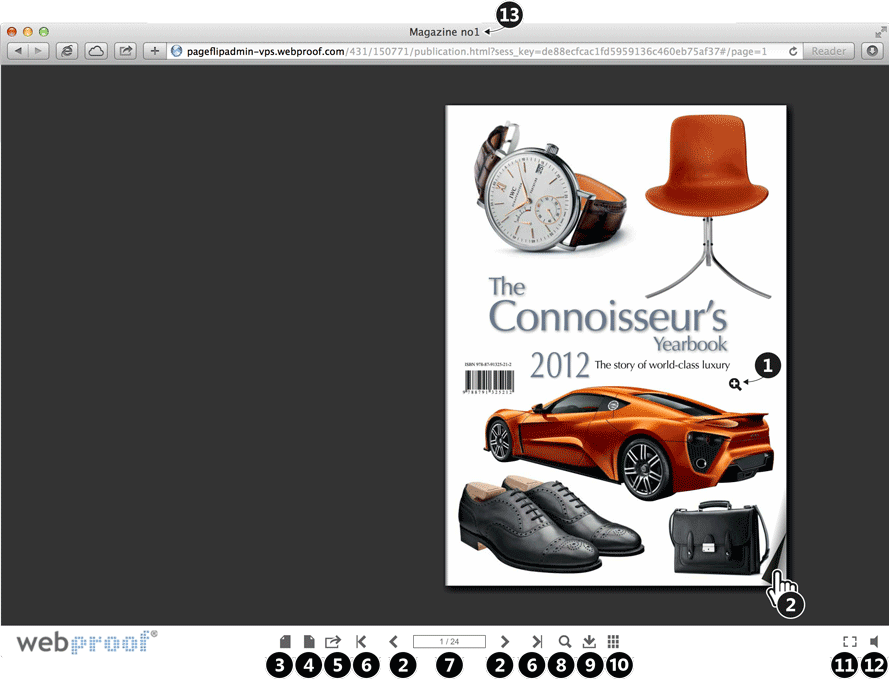
Publication Preview
- Click on page to zoom in/out.
- Click on page corner or on the buttons to flip 1 page at a time.
- Print left page.
- Print right page.
- Email the page(s).
- Flip to the first/last page.
- Go directly to a page by writing a page number and press "Return".
- Search for text in the publication.
- Download as PDF.
- Thumbnails view.
- Maximize/minimize window.
- Turn sound on/off.
- Publication title.
Comments